Our Authors
Reader, Writer, Web Designer, Husband, Son, Brother, Engineer
This guide covers an improved and fully updated Whirling Assault Falling Thunder Monk build. The build deals massive damage, automatically generates power charges to cast Falling Thunder every three seconds, clears fully juiced Tier 16 maps, and one-shots Uber bosses. All of this is achieved with below-average gear and no headhunters, magebloods, or triple-digit divine weapons. If you want to skip the early grind and acquire the essential gear pieces like good quarterstaff bases or Stonefist gloves faster, you can buy POE2 Currency to accelerate your progression and start blasting endgame content immediately.
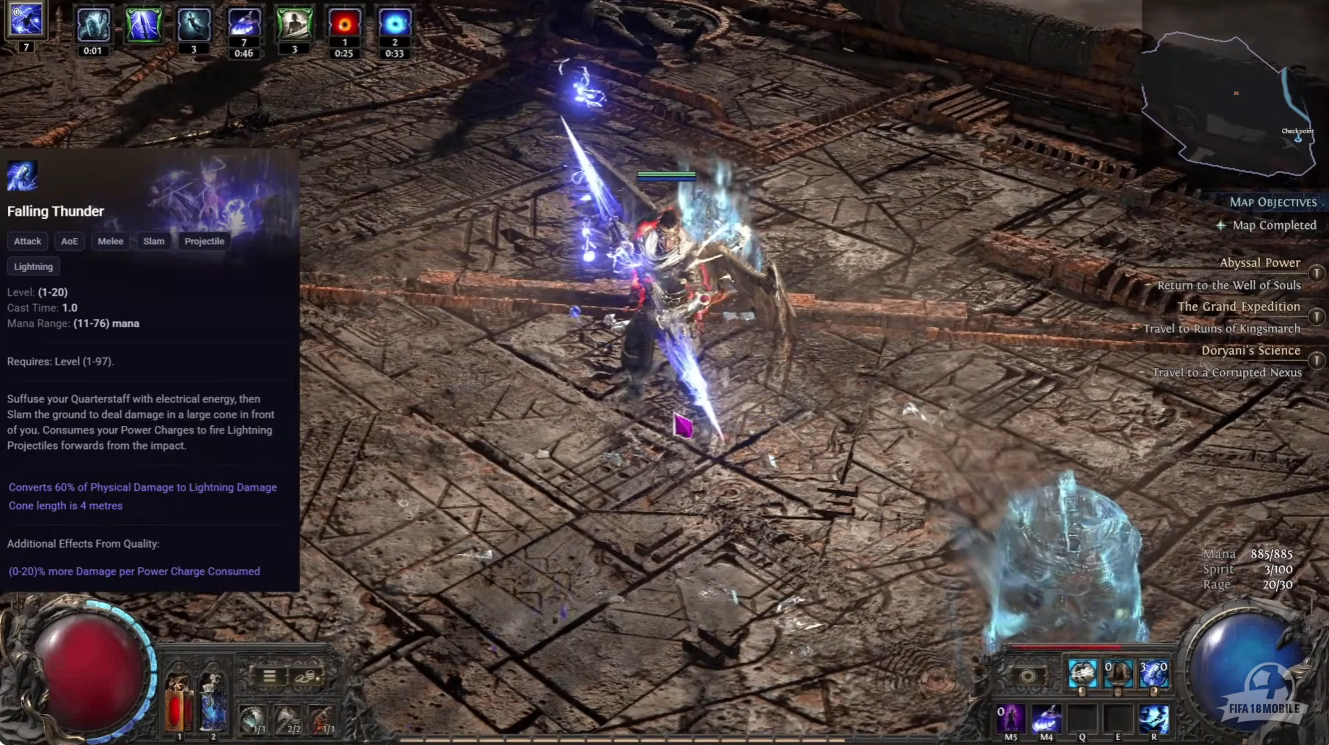
The build stays true to a spin-to-win playstyle. Whirling Assault is the main ability for clearing maps, while Falling Thunder is used every few seconds to delete packs and one-shot bosses.
Defensive stats: Nearly 5,000 energy shield and over 60% evasion rating.
Power charge generation: The build generates power charges automatically without requiring Arcane Surge on gloves or converting Whirling Assault and Shattering Palm into charge generators.
Three different options have been tested. All work, though some are more consistent than others.
Option One: Living Lightning and Bells. Use Living Lightning II, Culmination II, Auras Chime, and Charge Profusion on Hollow Focus. Bells constantly spawn around you, projecting Living Lightning minions and generating combos that convert to charges. This works but is the slowest method.
Option Two: Hollow Resonance. Use the same support gem combo with Hollow Resonance. This is more consistent since the bell is constantly on your back. However, it requires spending two ascendancy points for charge generation.
Option Three: Charged Staff (Recommended). Use the same support combination with Prolonged Duration as the fifth gem. As long as Charged Staff is active, you constantly produce maximum charges. To activate it, use Killing Palm on a ghost bell to get the first charge.
Whirling Assault (Map Clear): Magnified Area II, Elemental Armament II, Rage III, Ancestral Call II, and Efficiency II. If you have no mana issues, replace Efficiency II with Pinpoint Critical.
Falling Thunder (Burst Damage): Fist of War III, Culmination II, Nova Projectiles, Pinpoint Critical, and Breach Lord (projectiles return for double damage). This combination one-shots bosses.
Hollow Focus Bell: Magnified Area II, Elemental Armament II, Cooldown Recovery II, Super Critical, and Close Combat II.
Hollow Resonance Bell: Magnified Area II, Cooldown Recovery II, Close Combat II, Armor Break III, and Urox Smelting.
Tempest Bell: Elemental Armament II, Ancestral Call II, Heavy Swing, Close Combat II, and Rage Forged. Use this on bosses.
Mantra of Destruction: Support gems include Delayed Gratification, Prolonged Duration II, Chaos Mastery, Deliberation, and Armor Demolisher II. Using Mantra empowers Whirling Assault to break more armor.
Killing Palm: Thrill of the Kill II, Charge Propulsion II, Blazing Critical, and Rapid Attacks III. Use once at the start of a map or before a boss.
Herald of Thunder: Magnified Area II, Elemental Armament II, Calling Strike II, Elemental Focus, and Longshot.
Wind Dancer: Maim, Blind II, Magnified Area II, and Clarity I.
Ghost Dance: Cooldown Recovery II.
Use Killing Palm on a bell, activate Charged Staff, then spin. After two Whirling Assaults, use Falling Thunder. The pattern is: spin, spin, Falling Thunder. Repeat. On bosses, add a bell before using Mantra into Falling Thunder.
Gloves (Most Important): Due to Stonefist, gloves convert modifiers. Look for flat damage mods, +2 melee, critical damage bonus, attack speed, and magnitude of bleeding or poison. Arcane Surge is helpful but not needed. Attack speed is preferred.
Quarterstaff: Maximize damage per second with critical hit chance and +levels to melee. Avoid Dreaming bases as they have no critical chance.
Helmet: Full energy shield is recommended. Cap resistances and look for energy shield recharge, deflection, or critical chance.
Body Armor: Hybrid only. Cap resistances and look for energy shield recharge or deflection.
Boots: Full evasion works well. Movement speed is mandatory.
Belt: Ingenuity increases damage and defenses from rings. Alternatives include Headhunter or Mageblood.
Rings: Triple flat damage as prefixes, plus resistances. One ring should have mana leeching; the other should have rarity.
Amulet: Look for +levels of melee, critical hit chance, and increased global defenses. Anoint Overwhelming Strike for crit, Barbaric Strength for damage, or Lust for Power for Falling Thunder damage.
Stonefist Gloves never changes. Runic Meridian is recommended for rune variations. Hollow Focus is locked in for damage and utility.
The final choice is between Hollow Resonance and Martial Adept. Hollow Resonance breaks armor consistently. Martial Adept gives more charges and recharges your shield when using Mantra, but being hit stops the recharge. After testing, Hollow Resonance is generally preferred.
Mandatory nodes include The Power Within and Overflowing Power. Invest heavily in defensive nodes: Immaterial, Shimmering, Enhanced Reflexes, Hollowkeeper, Spectral Ward, and Patient Barrier.
For Chaos Inoculation: You need 4,000+ energy shield, decent recharge rate, stun and elemental thresholds, and no dead chaos resistance modifiers.
Jewels: A Timeless Jewel with crit chance or crit damage bonus. A sapphire jewel with maximum energy shield, crit chance, crit damage bonus, and mana on kill. Consider Heart of the Well Diamond for flat damage.
Our Authors
Reader, Writer, Web Designer, Husband, Son, Brother, Engineer